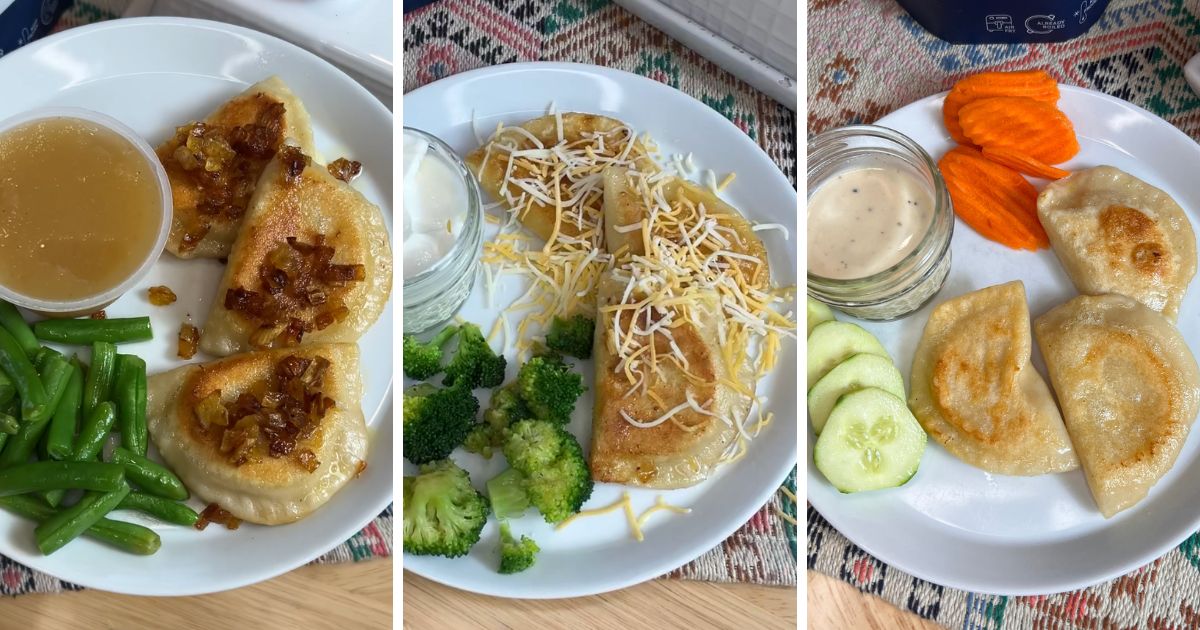
Back-to-school season means busy weeknights, and having a bag of pierogi in the freezer is one of my favorite ways to get a comforting, kid-approved dinner on the table fast. I always keep Jaju Pierogi stocked from Whole Foods, and the best part is how many different ways you can plate them depending on what your family is in the mood for. Below are three of my go-to ways to serve pierogi on busy weeknights, from classic pan-fried comfort to a baked-potato-inspired plate the kids love.
Pierogi have been part of my family's table for as long as I can remember thanks to my Polish heritage, and they're the kind of freezer staple that fits right into back-to-school meal planning - no defrosting, no fuss, just a pot of water and a hot skillet and dinner is ready in under 20 minutes. They're especially handy on nights when practices, homework, and after-school activities eat into your cooking time.
If you're building out your freezer stash for the school year, these pierogi pair perfectly with my freezer-friendly weeknight dinner roundup, and if you love easy Polish-inspired comfort food, don't miss my Polish comfort food favorites too.
Ingredients
Each of these three plates starts with the same base, a bag of Jaju Pierogi, then takes a different direction with simple sides and toppings you likely already have on hand. Here's everything you'll need across all three ways to plate.
- Jaju Pierogi
- Yellow onion, for caramelizing
- Green beans
- Applesauce
- Shredded cheese
- Sour cream
- Broccoli
- Cucumber
- Carrots
- Ranch dressing, for dipping
- Butter or oil, for the skillet
You won't need all of these at once - just pick a plate below and gather what goes with it. See recipe card for pierogi cooking quantities.
Instructions
All three plates start with cooking the pierogi in a hot skillet until golden and crisp - from there, it's just a matter of what you pair them with. Here's how each one comes together.
Pan-Fried with Caramelized Onions, Green Beans + Applesauce
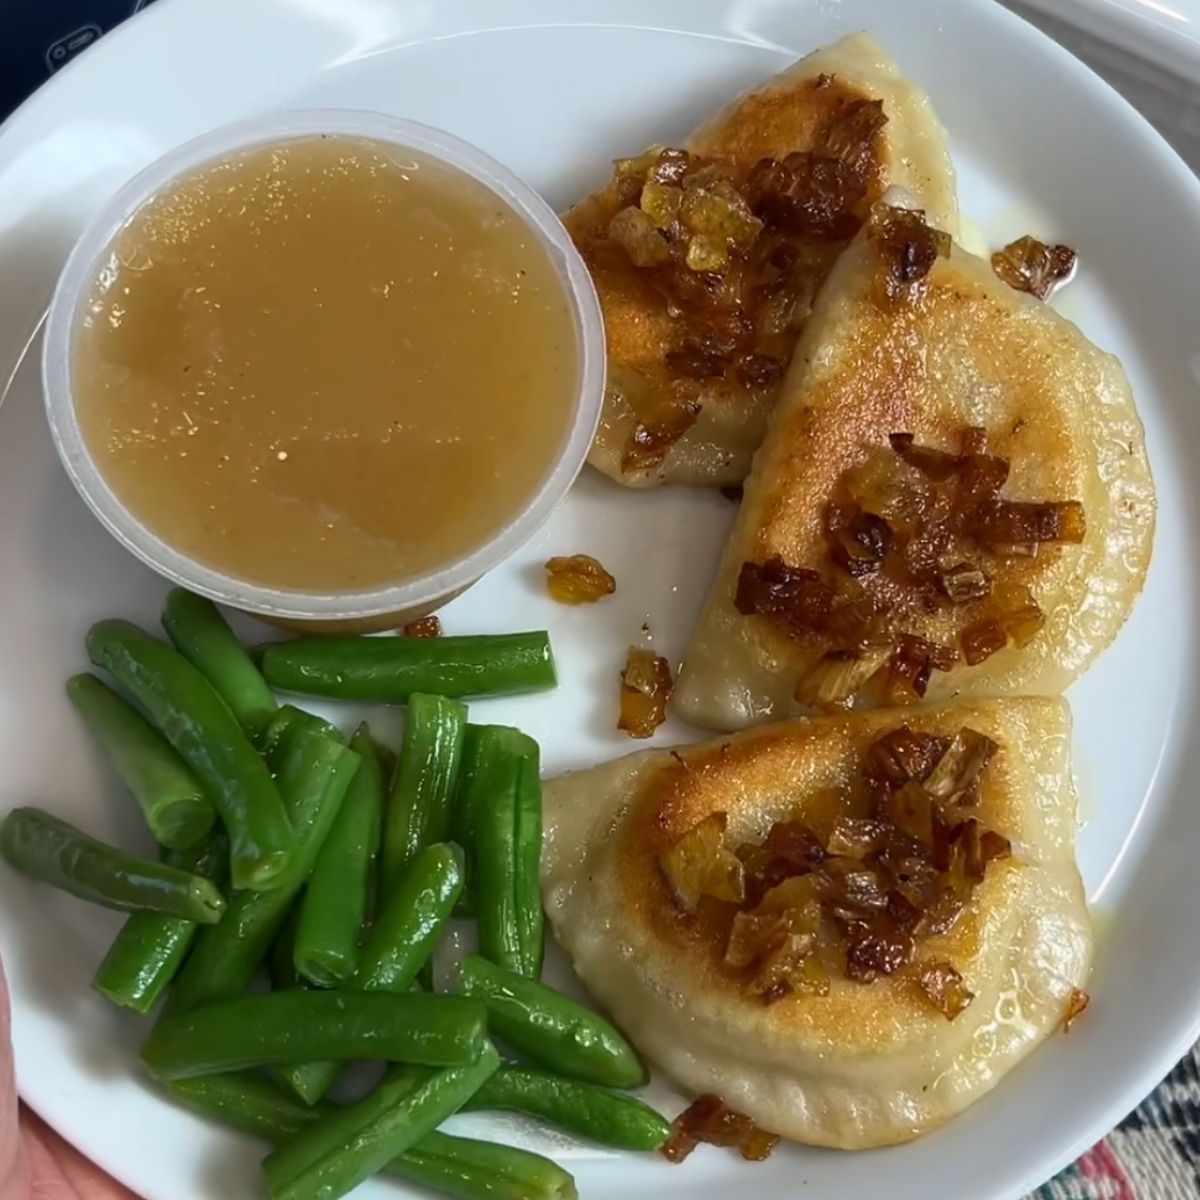
- Step 1: Cook the pierogi according to the Jaju Pierogi package instructions in a skillet until golden and crisp on both sides.
- Step 2: While the pierogi cook, caramelize the onions in a separate skillet with butter or oil over medium-low heat, stirring occasionally, until deep golden brown, about 20-25 minutes.
- Step 3: Steam the green beans until tender-crisp, about 5 minutes.
- Step 4: Plate the pierogi topped with caramelized onions, green beans on the side, and a scoop of applesauce - classic comfort meets light and fresh.
Baked Potato Style with Cheese, Sour Cream + Broccoli
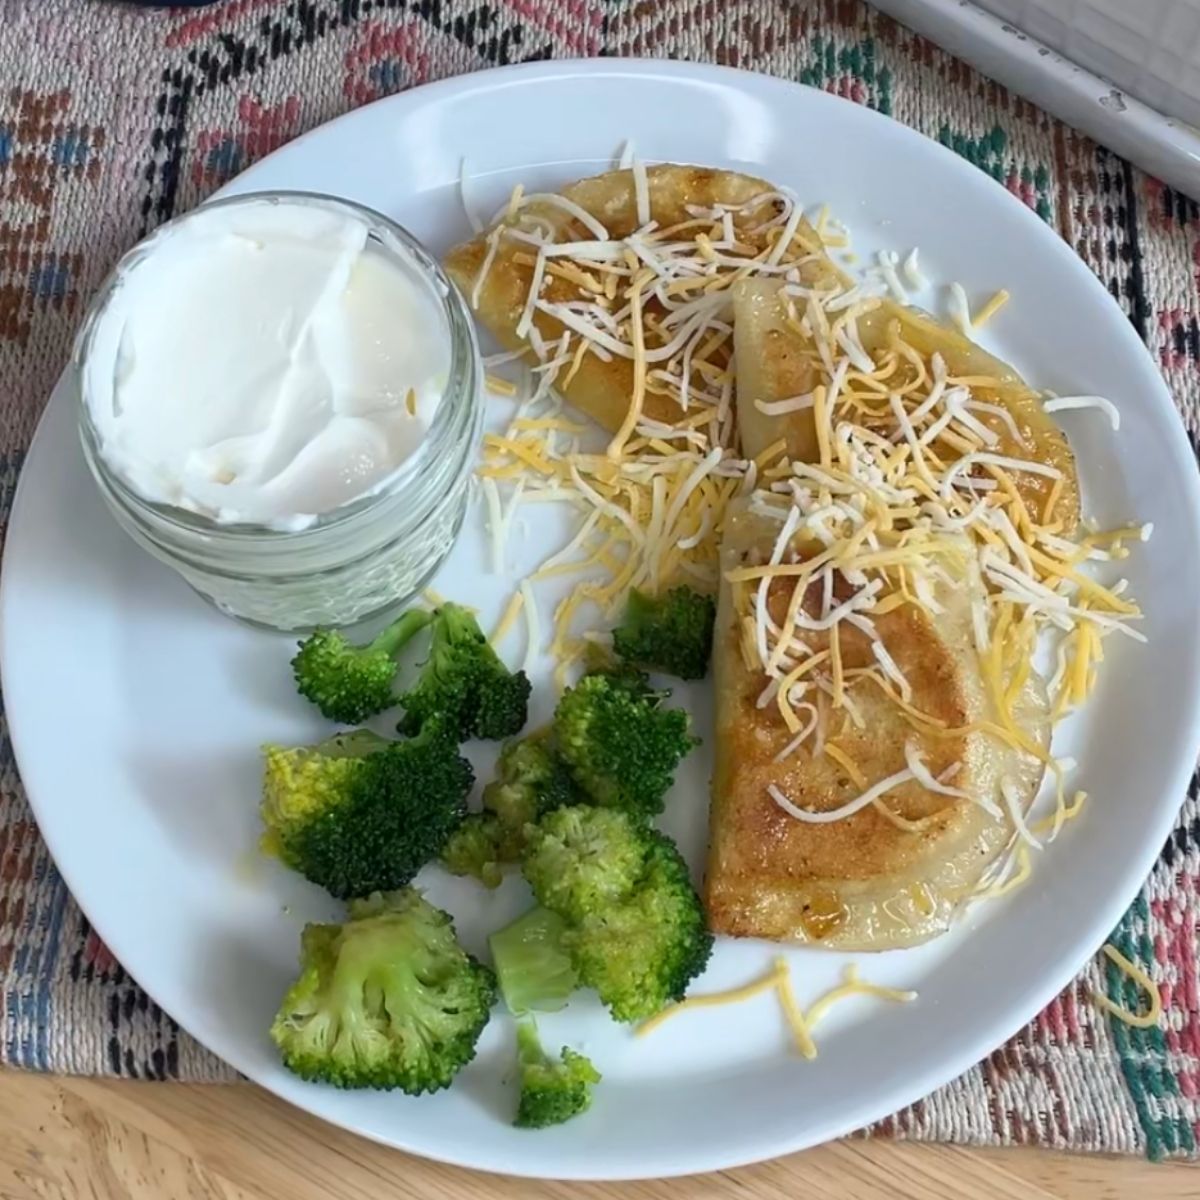
- Step 1: Cook the pierogi according to the package instructions in a skillet until golden and crisp.
- Step 2: Steam the broccoli until bright green and tender, about 5-7 minutes.
- Step 3: Top the hot pierogi with shredded cheese so it melts slightly, and serve with sour cream on the side for dipping.
- Step 4: Add the steamed broccoli to the plate for a baked-potato-inspired dinner the kids will recognize and love.
Crispy Pan-Fried with Cucumber, Carrots + Ranch Dipping Sauce
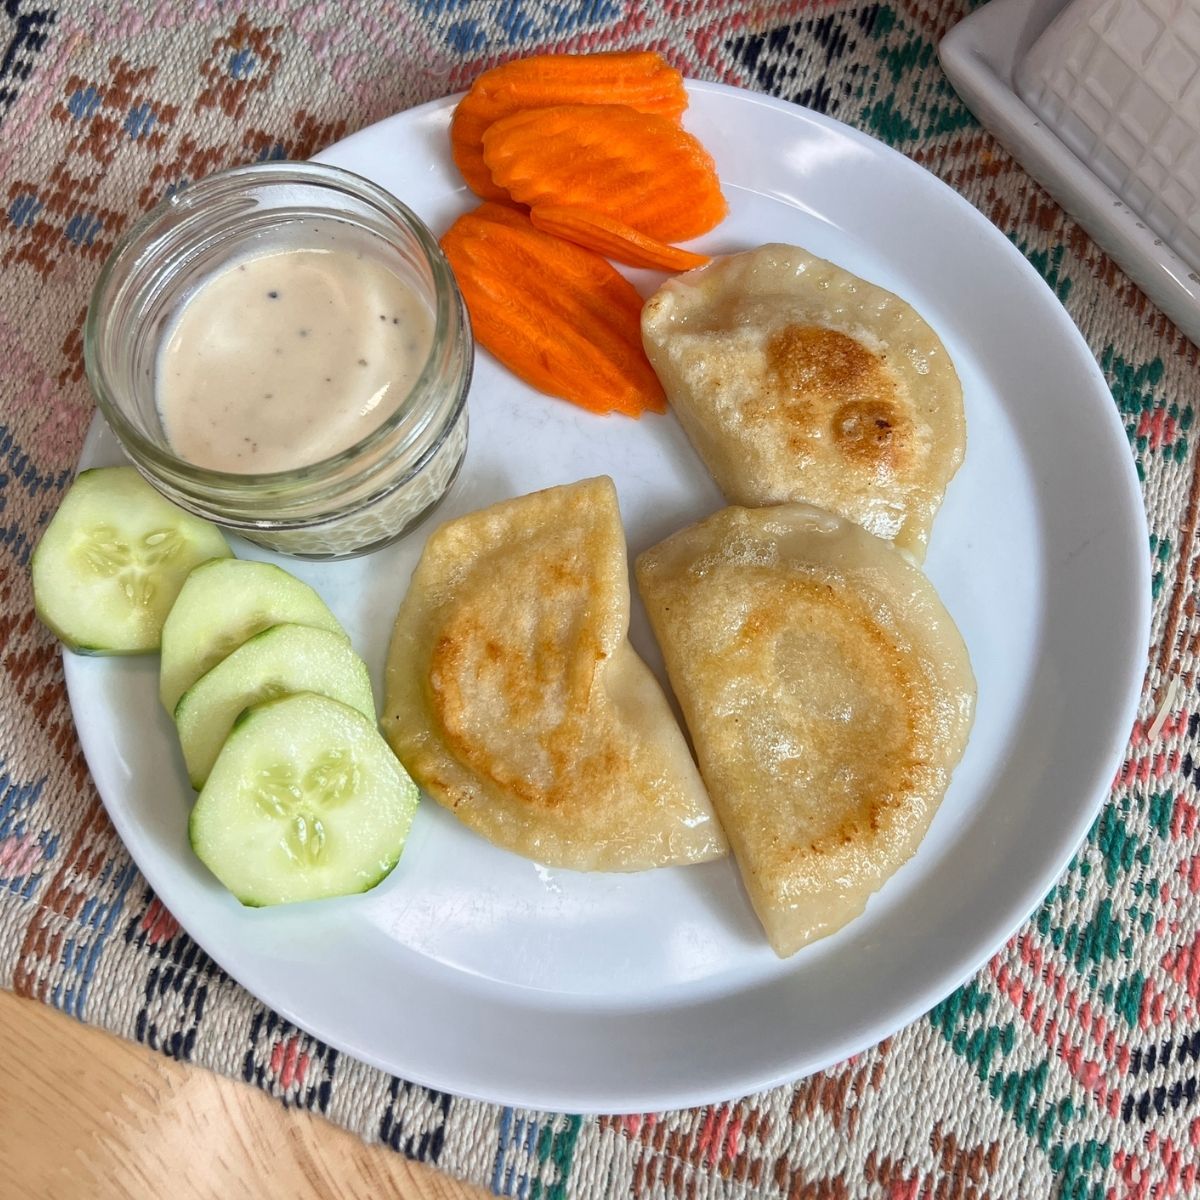
- Step 1: Cook the pierogi according to the package instructions until extra crispy and golden.
- Step 2: While the pierogi cook, slice the cucumber and carrots into sticks or rounds.
- Step 3: Arrange the crispy pierogi with the cucumber and carrots, and serve with ranch dressing on the side for dipping - a fun, hands-on plate that's great for picky eaters.
Hint: however you plate them, the key to crispy pierogi is not overcrowding the pan - cook them in batches if needed so they get a golden sear instead of steaming.
Top Tip
Keep a few bags of Jaju Pierogi in the freezer all school year long - they go from freezer to plate in under 20 minutes, which makes them one of the easiest backups for busy weeknights.
Variations
Once you've tried these three ways, don't be afraid to make pierogi your own. Here are a few more ideas to switch things up.
- High-protein - add a fried or scrambled egg, or a side of grilled chicken, to round out the plate with extra protein
- Extra veggie - swap in whatever vegetable your family has on hand, like steamed carrots or roasted zucchini
Which way are you making first? Share your favorite way to plate pierogi in the comments below!
Equipment
You don't need anything fancy for any of these three plates. A large nonstick or cast iron skillet is key for getting the pierogi golden and crisp without sticking, and a steamer basket or small saucepan makes quick work of the broccoli and green beans. If you're caramelizing onions, a heavy-bottomed skillet helps them cook evenly without burning.
Storage
Jaju Pierogi are freezer-friendly right out of the box, so keep the unopened bag in the freezer until you're ready to cook - no need to thaw first, you can cook them straight from frozen according to the package instructions.
Leftover cooked pierogi and toppings should be stored separately in airtight containers in the fridge for up to 3 days. Reheat the pierogi in a skillet over medium heat to bring back some of that crispy texture, rather than the microwave.